Signals
Signals are the heart of Dotient's semantic search. They let you train your own classifiers by showing the app examples of what you are looking for, then combining those concepts in powerful ways.
What Is a Signal?
A signal is a trainable classifier. You give it a set of positive examples (images that match what you are looking for) and optionally some negative examples (images that should not match). The backend trains a classifier from these examples using the image embeddings. Once trained, the signal can score every file in your archive for how well it matches.
The name is deliberately abstract. Rather than forcing you to name a concept before you understand it, you can just gather examples and let the signal learn what they have in common. A signal might represent "coastal landscapes" or "red objects" or "black and white portraits" or anything else that the embedding space can separate.
The Signals Lab
Open the Lab by clicking the "Lab" button in the sidebar or navigating to the Lab route. This is where you create, edit, and manage all your signals. It is also where you control hubness analysis, but we will get to that.
Creating a Signal
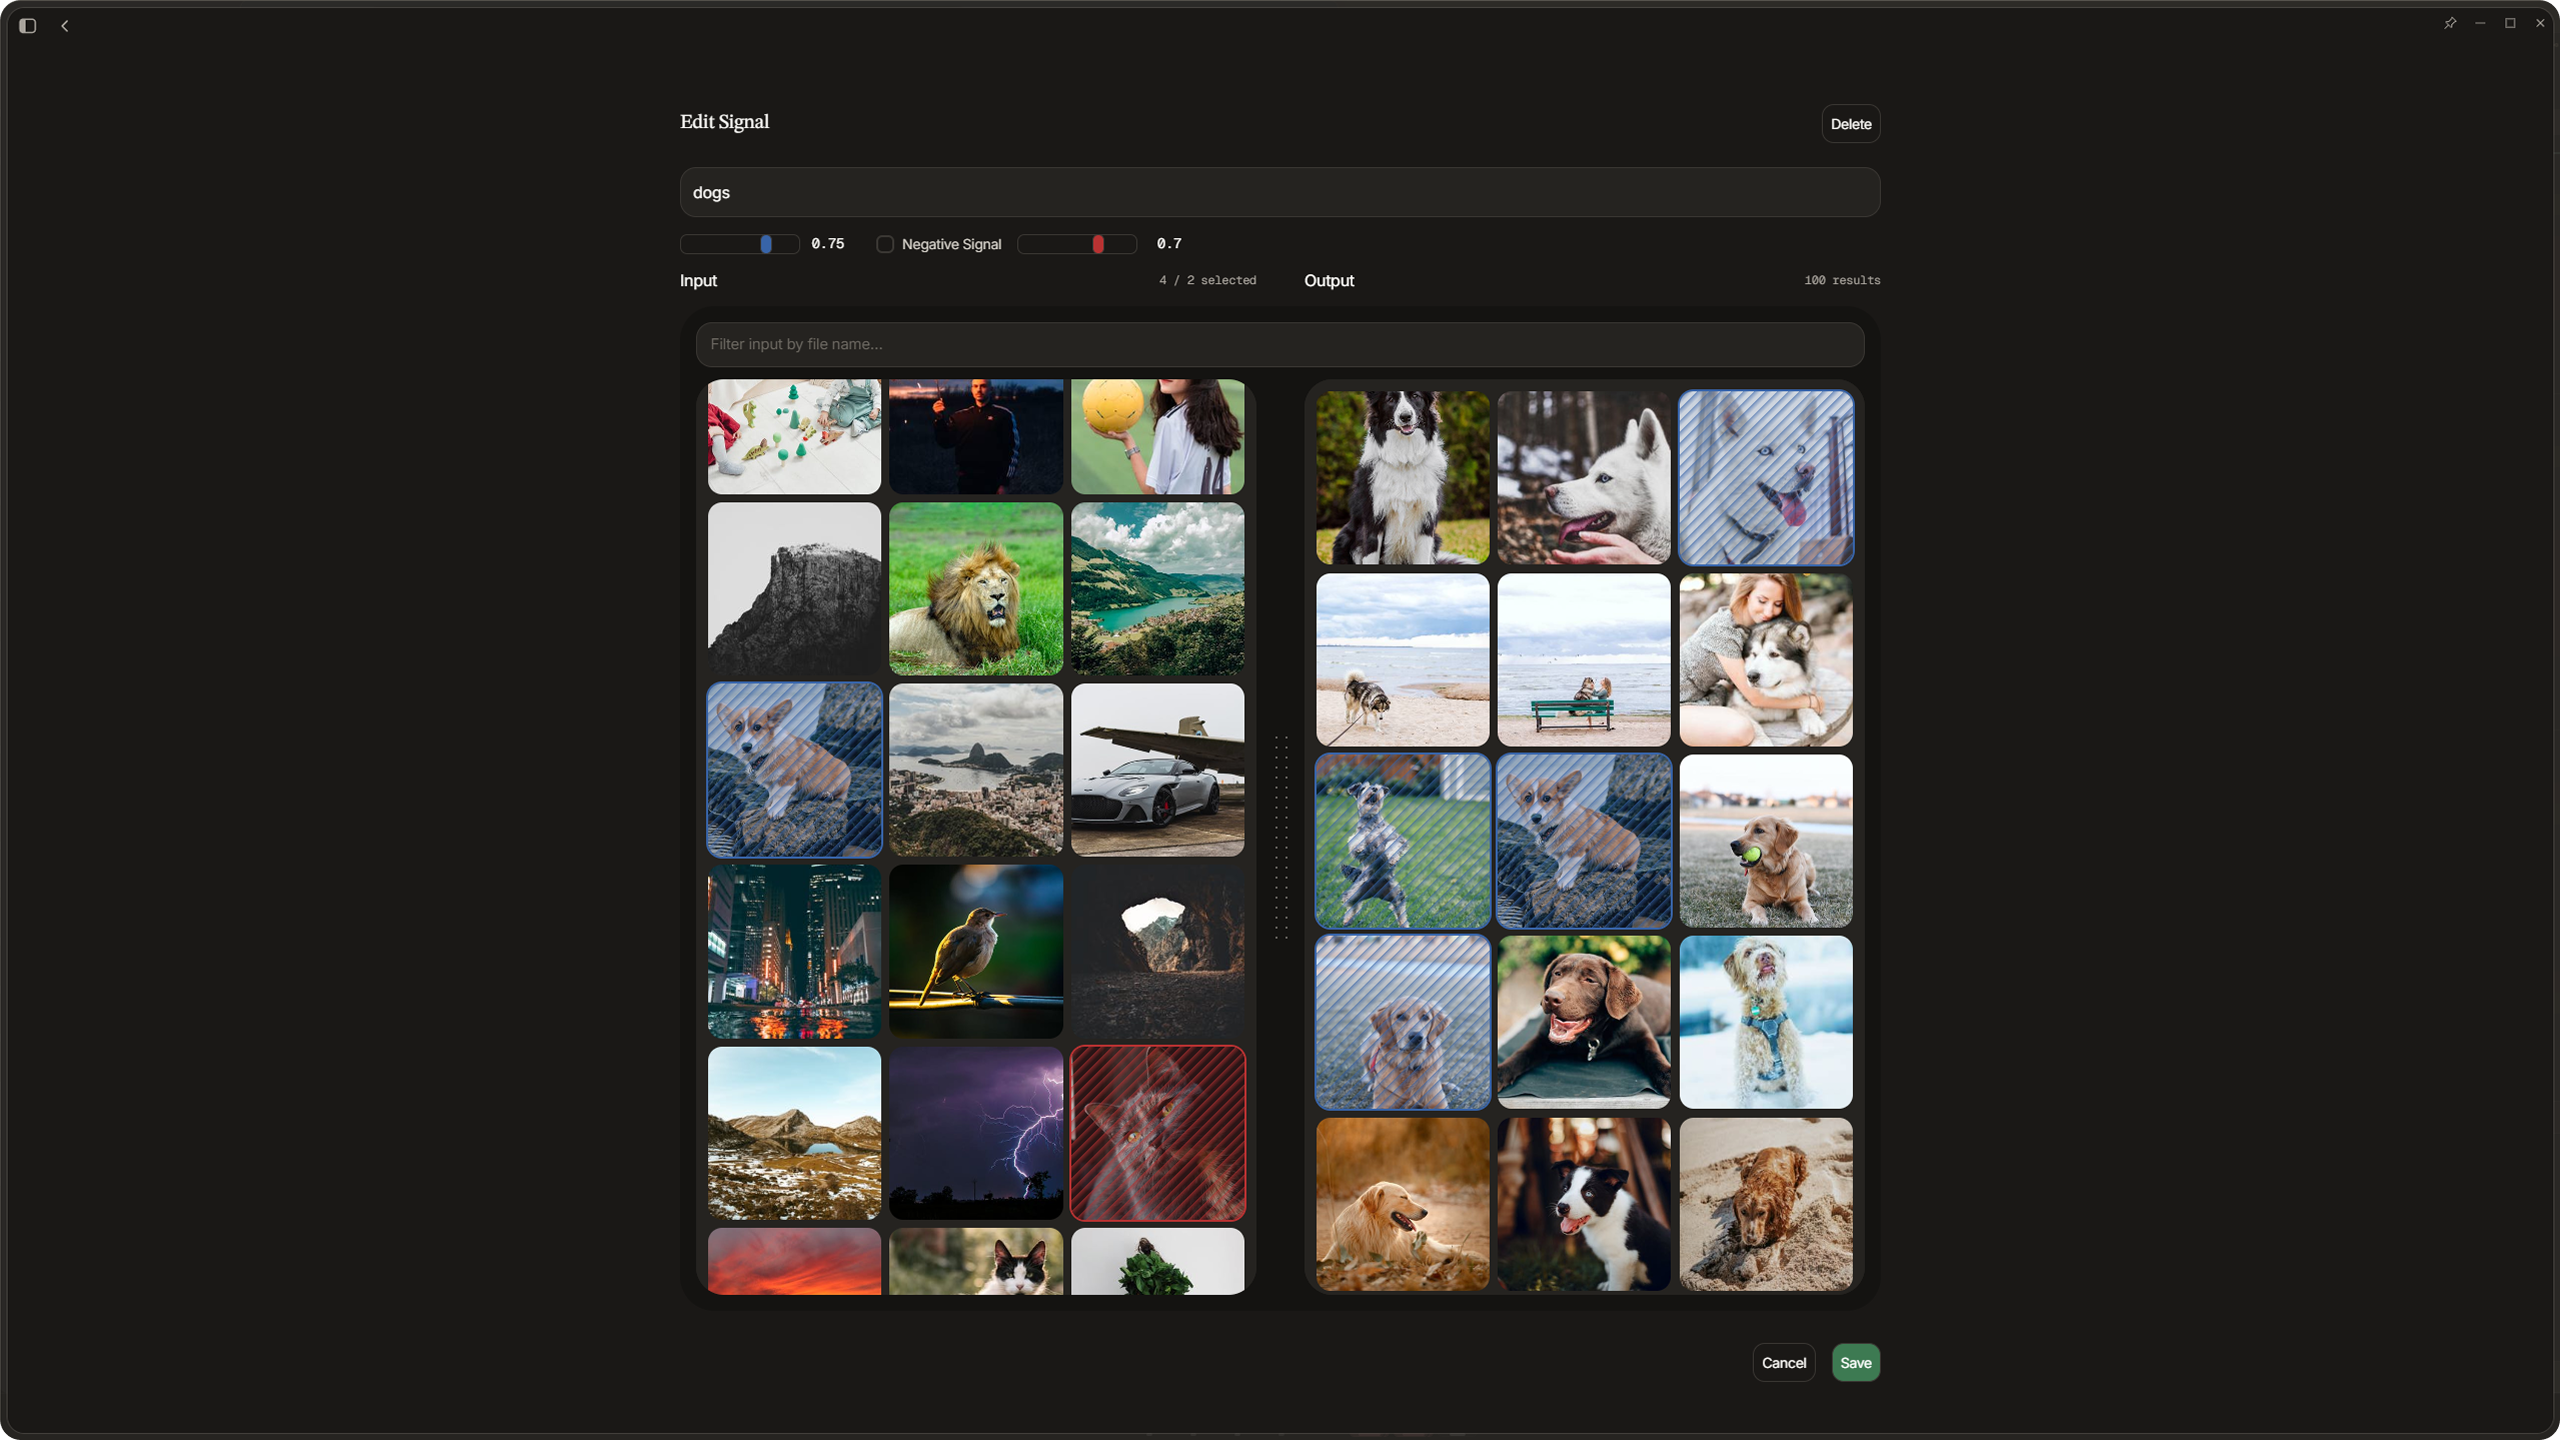
Click the create button to start a new signal. You will see a grid of your archive images. Select the ones that represent the concept you want to capture. These are your positive examples. You can also toggle into negative mode to select images that should be excluded. This helps the classifier understand the boundary of your concept.
As you add examples, the output preview updates in real time showing which files match with the current threshold. The threshold slider goes from 0.0 to 1.0 and controls how strict the signal is. A lower threshold returns more results but with less precision. A higher threshold is more selective.
When you are happy with the results, name your signal and save it. The name is important because it is how you reference the signal in search queries later.
Editing a Signal
You can go back and edit any existing signal. Add or remove examples, adjust the threshold, and see which files are newly included or excluded highlighted in the preview. This makes it easy to iteratively refine a signal until it captures exactly what you want.
Pinning Signals
Once a signal is saved, you can pin it from the Lab. Pinned signals appear in the sidebar for quick access. Clicking a pinned signal name triggers a search for it. Clicking the same pinned signal again clears the search.
Searching with Signals
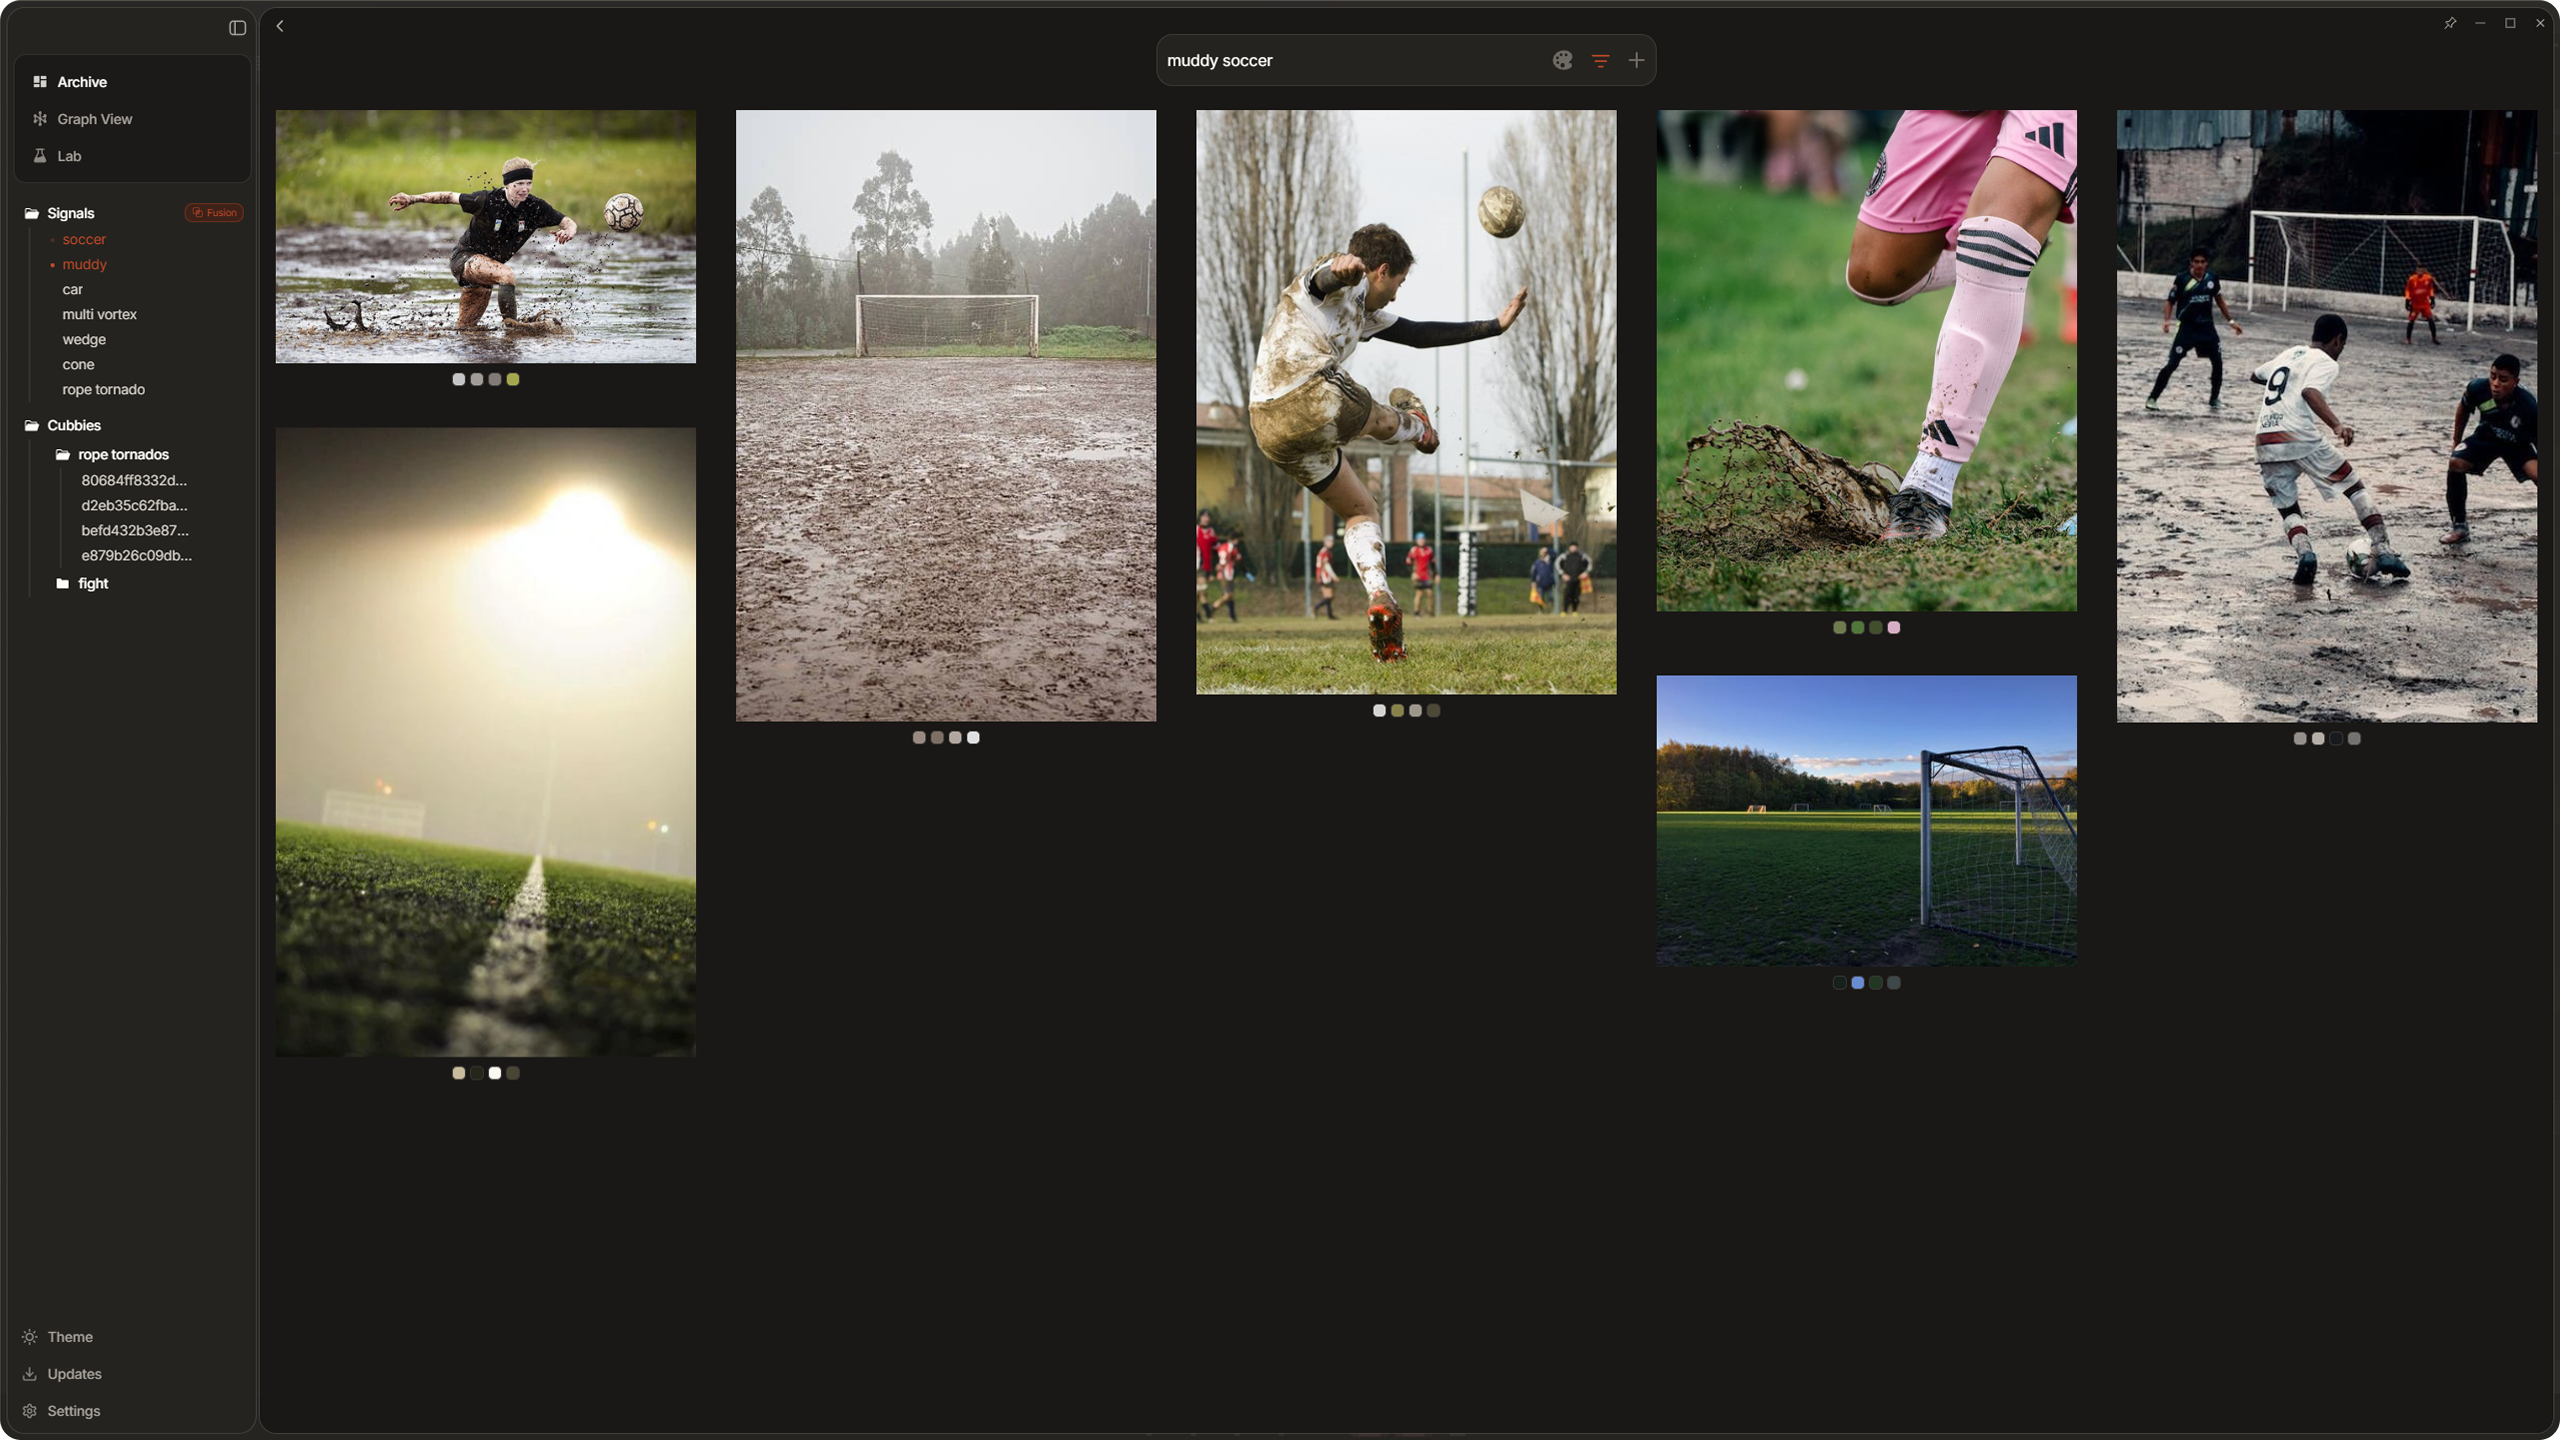
When you type a search query in the sidebar, Dotient checks if any of your pinned signal names match the query. It uses fuzzy matching with Levenshtein distance, so you do not need to type the name perfectly. When a signal matches, its results are factored into the search results.
You can even match multiple signals at once. The sidebar shows a line called "Fusion" when multiple pinned signals intersect with your query. This lets you combine concepts, like searching for a "coastal" signal and a "vintage" signal at the same time.
The signal matching also filters out common English stop words so natural language queries like "show me my coastal photos" will still match a signal named "coastal".
Hubness Analysis
Hubness is a phenomenon where certain images (called hubs) appear in the search results for many different queries, even when they are not particularly relevant. This happens because some images have embeddings that are close to the center of the distribution, making them neighbors to everything. The result is that your searches keep returning the same random images instead of what you actually want.
How to Use Hubness Filtering
The idea is simple. Whenever you search for something in the gallery and the top results are just random junk that has nothing to do with your query, that is a good candidate to add as a hubness filter query.
Open the Signals Lab and find the hubness analysis panel. Add the search term you just tried as a new query. The backend will embed it and track which images show up as top results for it. Over time, as you keep encountering searches that return bad results, add each of those queries into the hubness filter. Every query you add gives the system more data about which images are acting as hubs.
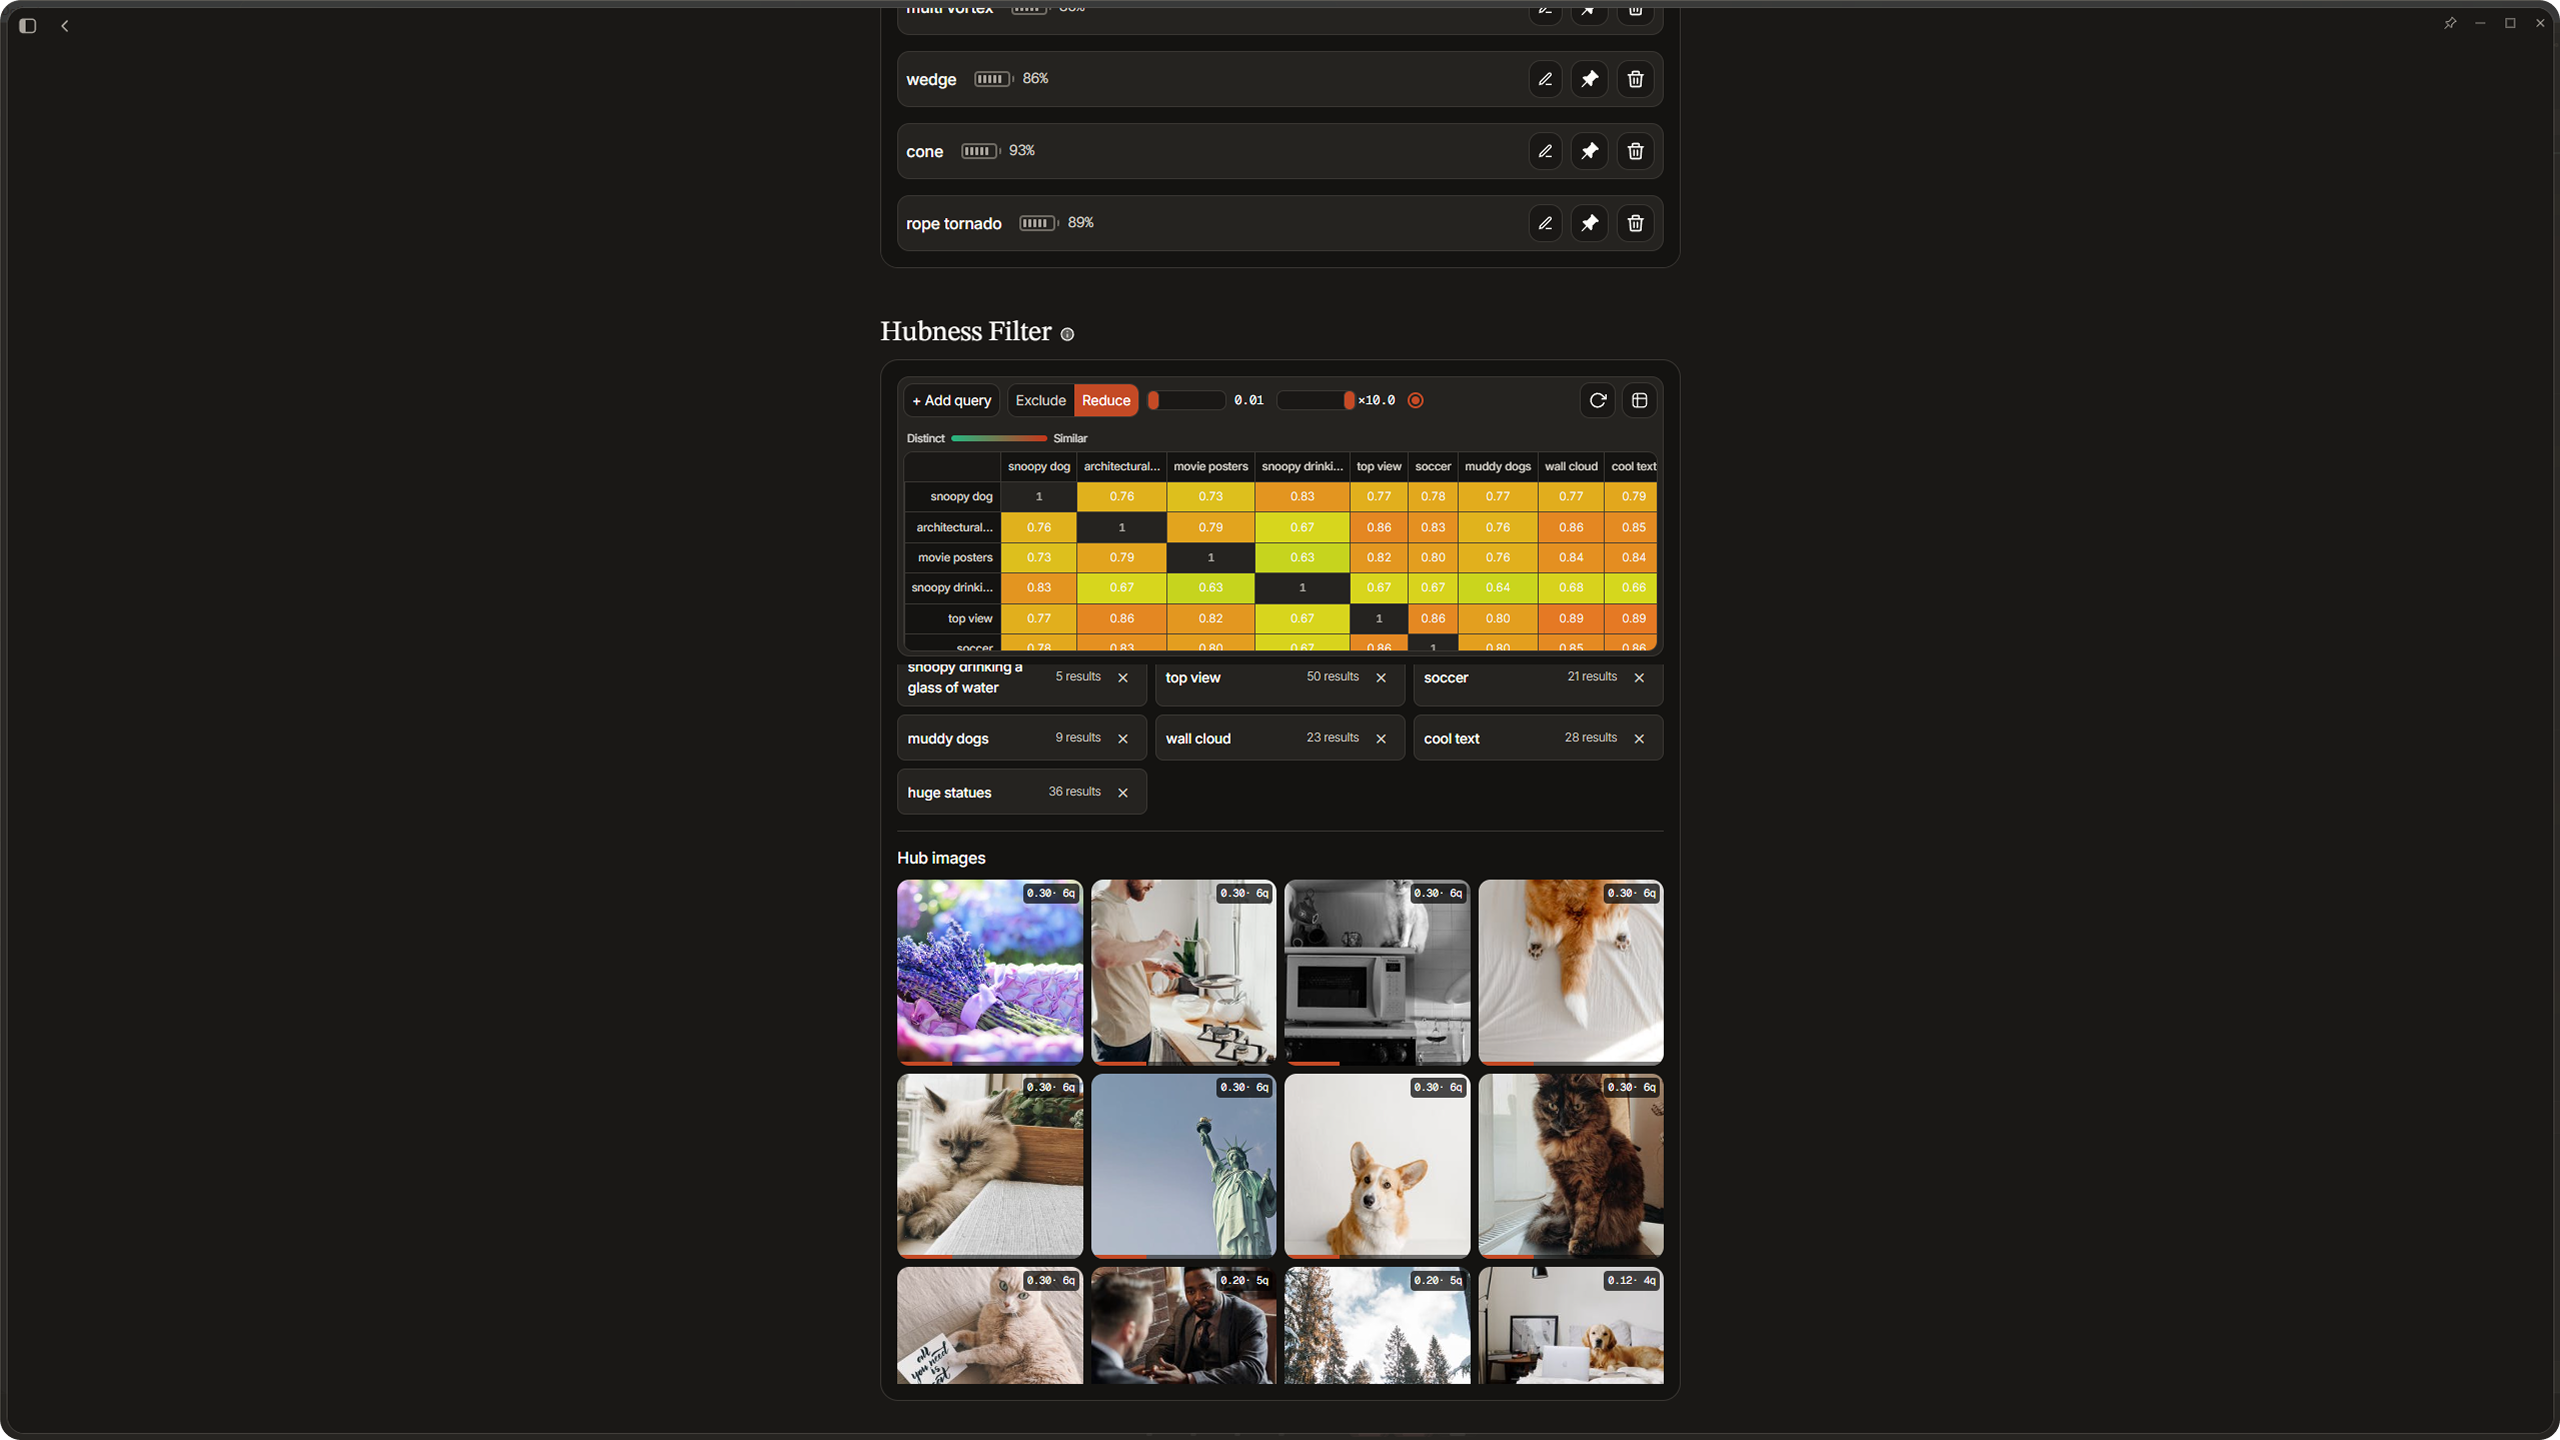
The hubness panel shows you a similarity matrix that lists all your tracked queries and how similar their embeddings are to each other. When two queries are very similar to each other but both return bad results, that is a strong signal that certain images are hubs. The system factors this in, and the more similar the poorly performing queries are, the higher the penalty gets for the overlapping images.
So the workflow looks like this. You are searching through your archive normally. A search comes back with irrelevant top results. You add that query to the hubness filter. You keep searching. Another bad result. Add that query too. After a handful of these, the hubness analysis starts identifying the same images appearing across all those queries, and it marks them as hubs. Turn on hubness correction and those images stop cluttering your results.
Modes and Controls
Two modes let you handle hubs once they are detected. Exclude mode removes hub images from search results entirely. This is the most aggressive option and works well if there are a small number of obvious hubs. Reduce mode down-weights hubs by a penalty factor instead of removing them entirely. This is better if you are not sure whether an image is truly a hub or just genuinely popular.
The threshold slider controls how aggressive the hubness detection is. Lower values require stronger hub signals before an image gets flagged. Higher values are more sensitive and will flag more images. The penalty slider only applies in Reduce mode and controls how much flagged images get pushed down in results.
These settings are also available in the Settings panel under the Algorithm tab, so you can tune them without opening the Lab. You can also clear all accumulated hubness data from the Algorithm tab if you want to start fresh.